Texture
Photos of plants (and other textural things).


Pages 41, 42, 43
My bank of texture words;
Rough, bumpy, smooth, soft, rutted, bouncy, coarse, uneven, silky, shiny, knobbly, gnarled, crumpled and wrinkled.
I looked at Bridget Riley's work, which I found disturbing as it made my eyes go funny, but as suggested, I stitched an element of the piece "waterfall"

Experiments with stitching textures.
I decided to free embroider with the feed dogs down, the textures I was going to create. I stitched a cactus, moss, thistle leaves, a rose and an allium and described them.

Mark making to create visual texture

Page 44
I drew with black pen "the whisper of a morning wind through trees" and imagine the wind gentling swishing through leaves and twigs making a soft noise. The using the edge of a sponge and black ink, I made marks that made me think of an aroma drifting from a flower to depict, "the fragrance of a red rose on a hot day"; it wafted like a mirage in the heat. The next mark-making is in white chalk on paper painted with black ink to depict the grass and little spikes of frost, with slippy footprints crunching and slipping, not so easy to think of the stitching here. Then charcoal was used to create a spiky bush to depict, 'Struggling through a thorn bush" and finally, using black pen I entangled the stem and leaves and tendrils to show, wrapping myself in a cocoon of vine leaves.
and to stitch;

Page 45
I used a pastel standard thread to make my marks of a morning wind and in the stitching added, 'shh' through the breeze to feel the sound of the movement.
For the rose, this is a heady strong scented rose, I stitched the aroma wafting away carrying the scent in DMC 8 cable stitch to show the power of the scent.
The cocoon of vine leaves were sweeps of intertwining green DMC 8 with leaves and tendrils that give the impression of softness, whereas the image of 'struggling through a thorn bush, is sharp and spiky and uncomfortable.
Creating texture with paper and glue
I found an image of bark that I would use to try and re-create the texture seen using stitch.

Page 45. Source photo above, PVA/Tissue below
Using thinned PVA glue I shaped and moulded tissue paper to re-create the texture of the bark. This was left to dry and then painted to find the heights and depths in the photo. The tissue/PVA image is t the bottom of the three images below.

Page 46
Creating texture with fabrics and stitch
A piece of black felt was cut to the size of the image which was A5 approximately and a line drawn then stitched around the margin to be stitched within.

I selected the colours that I thought best matched those in the photo, but I didn't have everything so my final image is not as close a match as it might have been.

I stitched the lower profile lines into the black felt having placed Stitch and Tear beneath as a stabiliser and found my line by stitching rough placements from the front side.

The pieces that were left of the brown and green once I had stitched my textures and cut them out!
Then using two other pieces of felt, both kunin felt, one green for the lichen and brown for the bark, I used a variety of stitches both from the back with cable stitch and the from, granite stitch, whip stitch and straight free embroidery to develop the items which would be stitched onto the base fabric as depth, profile and texture to the piece.

Top left quarter of sample
The brown felt was added over the black and stitched in place, the piece of brown felt was cut wider that the area it was to occupy and when stitched down was pushed up to create a sense of height. This probably shows best at the top of this section. I use a heat gun to distress elements of the sample as can be seen top left under which can be seen stitching on the base layer
Top right section
This section contained small spidery lichens and I used a silver standard thread and whip stitch to create this texture. The yellow lichen is a bit brighter that on the original bark but was the closest colour that I had. These little dots of lichen were all stitched onto a mid green piece of kunin felt with granite stitch and then using the silver thread, stitched down using granite stitch.

Bottom right section of sample
Using the mid green kunin felt, and stitched separately then added to the main piece, silver standard thread was stitched using granite stitch and pushing the sides in to create height in the texture of the lichen on bark. Smaller pieces were created in the same way and added separately

Bottom left section
The left hand area was stitched using a spiky free embroidery stitch to try to depict the spidery lichen but for other areas, the green felt was not used and whips stitch was used, which I think created a better result.
All over the brown felt and on top of the sample, lines of black standard thread was free stitched to depict the small cracked areas of bark which would have been difficult to show any other way

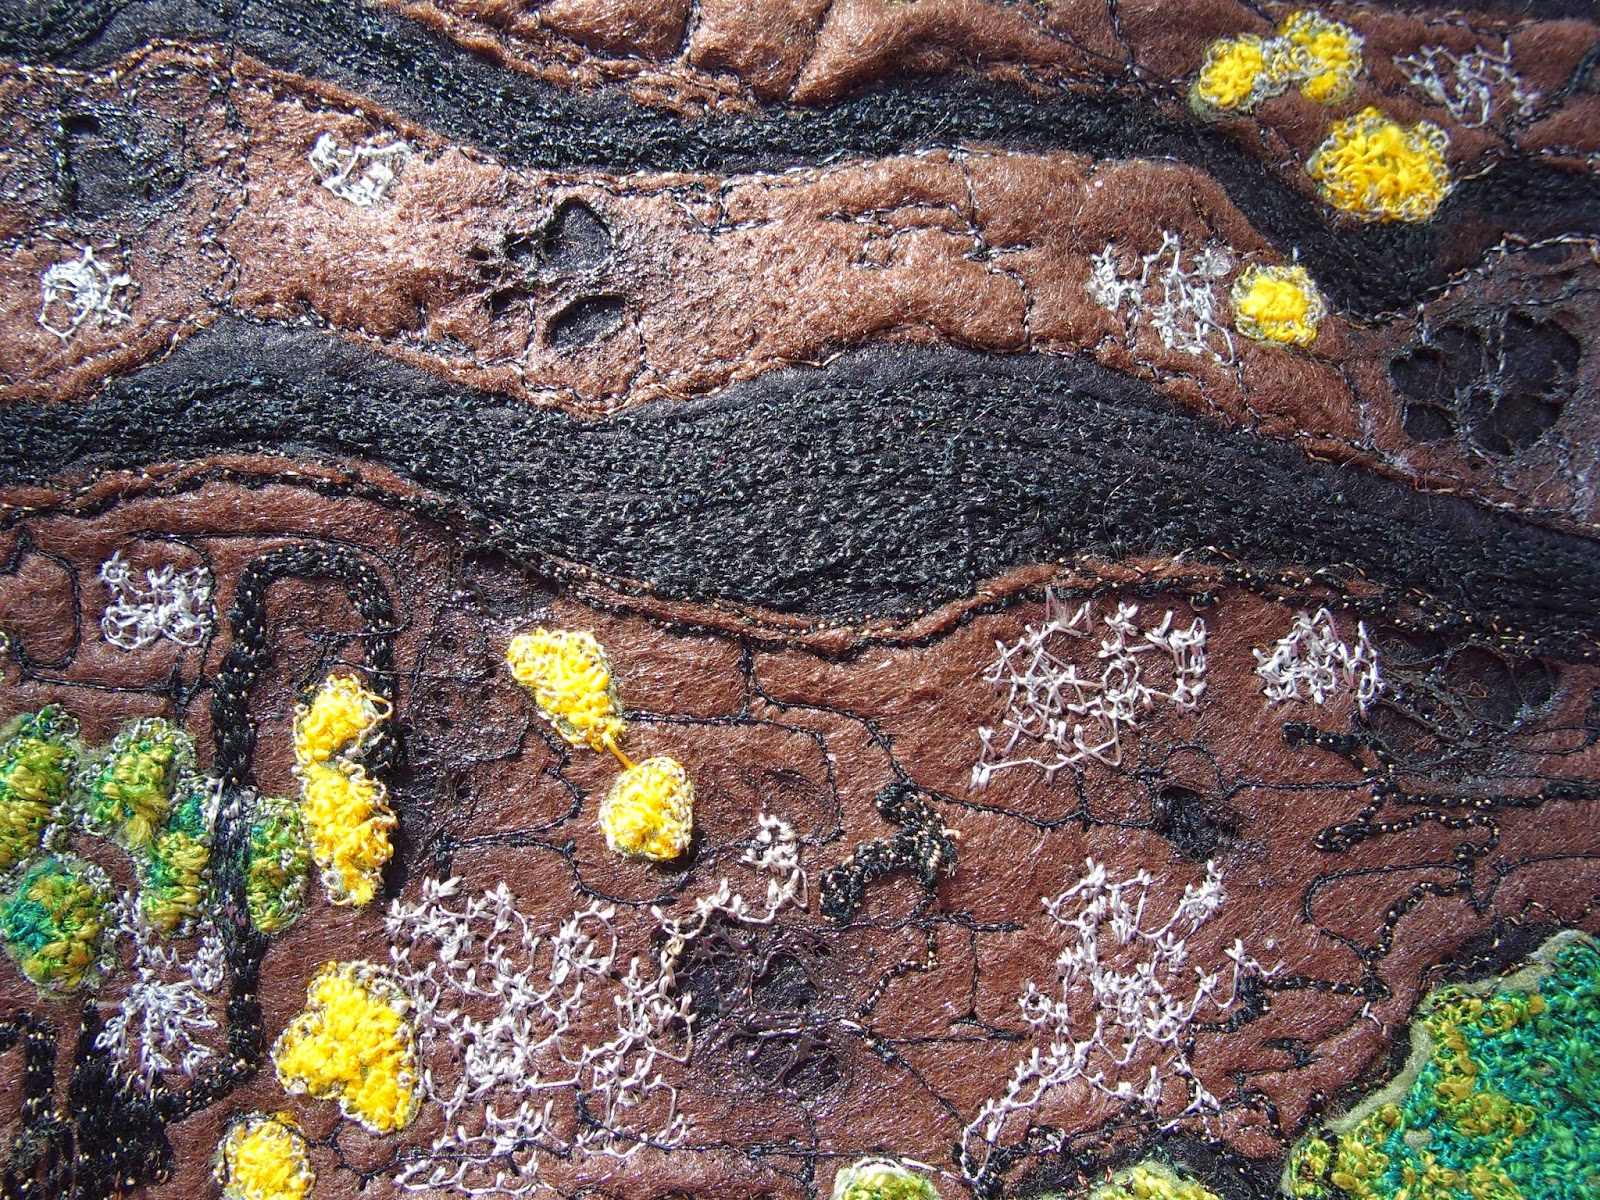
Page 46
The final sample
The sample did not not call for lines of stitching as for the example in the chapter therefore I made an attempt to create an end result that met the brief of texture in stitch. The height of the texture can be seen by the depth of shadow on the bottom central lichen.
Whilst I didn't have the colours I would have liked to best match the original image, I am pleased with the outcome as a stitched piece. I had not used the heat gun before so was interested to see how that affected the work. It was a bit risky as I had finished stitching but I like the effect it made.
No comments:
Post a Comment