Using Indian papers in different weights and colours and ink blocks, including the one I made for Chapter Two, to complement the colours, the paper was printed on both sides. Different sizes and shapes of paper were made.
Using 'foot on' and automatic patterns the first sample was stitched cut, curled and connected together with a micro-stitcher.
Page 55
Page 55
Using a rectangle of block printed lighter weight Indian paper, a 'vermicelli' automatic pattern was used to stitch the sample which was then folded across the length and curled with a scissor blade, ends being connected through small slits in the paper. The paper had a fabric feel to it once stitched as it was so lightweight.
Page 55
A circle of lightweight Indian paper was stitched in the style of a lotus flower using two automatic patterns and variegated threads, creating petal shapes and the negative remainder of the paper was left unstitched. The negative petal shape and the external circle were automatic pattern 'blanket' stitched and the petals shapes cut towards the centre of the sample where a circles pattern had been used again with variegated thread.
The edges of the negative shapes were joined with an automatic 'blanket' stitch stitching twice round the circle for strength. The petals were then twisted slightly to be joined to the negative shapes with a micro-stitcher. I then photographed the 'bowl' shaped which resulted. I am very pleased with the result as it is free-standing and attractive.
Page 56. Top view of stitched and cut circle
Page 56. Bottom view of stitched circle
Page 56. Side view of stitched circle
The next sample was to use three layers of paper. One was orange block printed tissue paper. one red block printed with a gold "leaf" pattern and the middle layer was A4 printer paper block printed with elephants - all of these were papers that I had printed before so it was good use of stock. This time, the paper was torn rather than cut.
Layers of paper
Page 55
Stitching on thinner papers
The next exercise was to use a paper napkin to stitch thinner papers. A napkin with autumn leaves was chosen and a small section selected to be sewn.
Page 57.
The whole napkin was left intact for ease of stitching. Layers were created by using Wondaweb behind the back and front layers of the separated napkin with calico in the centre.
Using free embroidery and a range of complimentary colours, the selected section of the napkin was stitched using a range of stitches, mostly straight but a little zigzag and some whip stitch on the berries. Variegated and plain threads were used where appropriate
Page 57.
The back of the napkin was white so the reverse of the design looks delicate and pretty. This sample is in my book but all of the 3D samples are in a box.
Page 57
Acrylic wax
For this sample, two sheets of complimentarily coloured crinkly wallpaper sample pages were used back to back having been block printed with my block made in Chapter 2. The paper samples were mustard and orange coloured and the block paint was white. Once the block paints had dried, acrylic wax was applied with an old brush and allowed to dry
The paper was stitched back to back with orange and yellow threads and an automatic pattern then curled inwards and outwards and wrapped around itself to created an interesting looking sample.
Page 58
Wire mesh
I have bought quite a lot of wire mesh and cloth but had not use heat or stitch until now. I have read both Alsyn Midgelow-Marsden and Anne Parr's books on working with metal and was really looking forward to this part of the chapter.
I followed all the health and safety advice and using the kitchen blowtorch for creme brûlée (not any more) I heated some copper mesh and immersed it in water to cool quickly.
Then I stitched it with free embroidery to see how it worked. I wanted to protect my machine so backed the mesh with a water soluble sheet which I washed away before cutting the sample to manipulate. I wanted to see how this went both on copper mesh but also on stainless steel cloth.
Page 58
Page 58
Page 58
Automatic patterns were used on the steel cloth with a little free embroidery at the bottom. Again, water soluble machine protection was used and washed away prior to cutting and manipulating.
Page 58
The delicacy of the steel cloth is beautiful. It colours well with heat. I also really like the blues and shades that heat creates on copper mesh and used this for the next sample which was cable stitched and infilled with feather and granite (ish) stitch.
Page 59. Side view of stitched copper form
Page 59. Top view of stitched copper form
Layers with wire mesh
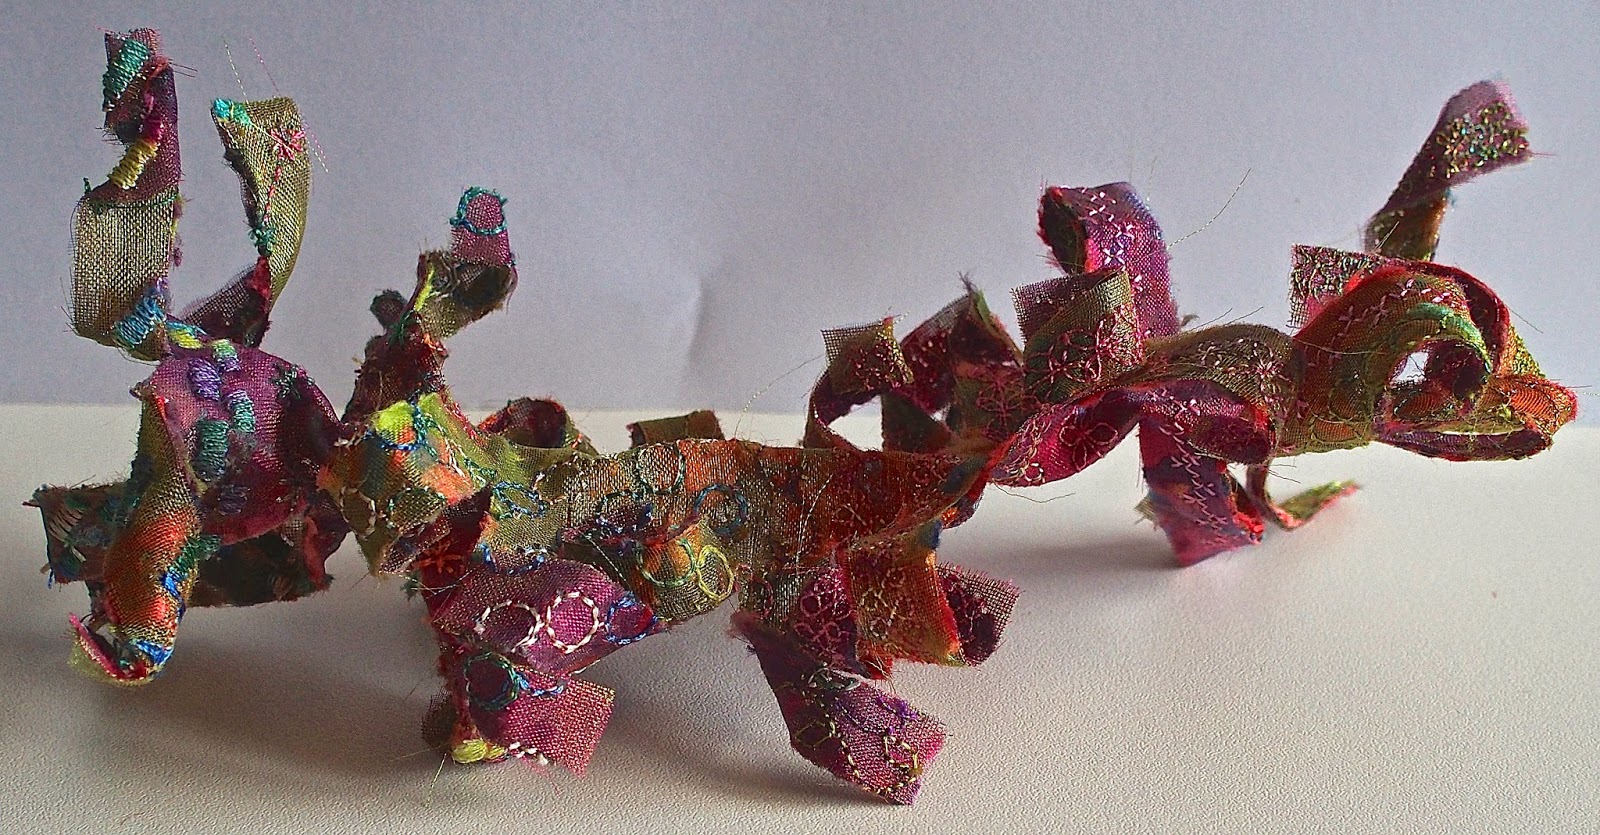
A piece of copper mesh was heated coloured, then sandwiched between a layer of purple organza on one side and green organza on the other. Between the copper and fabric, small pieces of yarn left over from the last chapters 'snippets' exercise, were laid on the copper and using automatic patterns in a range of plain and variegated bobbins and top colours, a new fabric that could be manipulated was created.
I had though to make a 3D form to represent the paper fern manipulation form the last chapter but decided to leave this until chapter 10. So I made a Chinese Dragon! Well that's what it loped like once I had manipulated the wire mesh.
Page 60. Side view of manipulated stitched sample
Page 60. Top view of manipulated stitched sample
A most enjoyable chapter!


No comments:
Post a Comment